By adding this integration, your data may be sent to AWS or hosted model providers for certain actions within Arize AX (e.g., prompt playground) and your account may be billed for usage.
Add the Integration Using the Arize Skills
Add an AWS Bedrock integration from your coding agent using the Arize Skills:Create an AWS Bedrock integration named 'my-aws-bedrock' with my base URL https://bedrock-runtime.us-east-1.amazonaws.com and Bearer Token bedrock-api-key-YmVkcm9jay...
Add the Integration from Arize AX
Select AWS Bedrock from the Providers List

The AI Provider integrations tab
Fill Out Your Integration Details

The AWS Bedrock integration configuration pane
Authentication Settings
Next you will need to select the authentication settings, either assume role, bearer token (API key), or custom headers.- Assume Role
- Bearer Token
- Header Based Auth
Arize AX will assume the role you create to run
InvokeModel commands against Bedrock models in your account. The following will create a least privilege role in your AWS account. It will also configure that role so that Arize AX can assume it.-
Copy the permissions policy in Arize AX:

-
Create a permission policy in your AWS account:
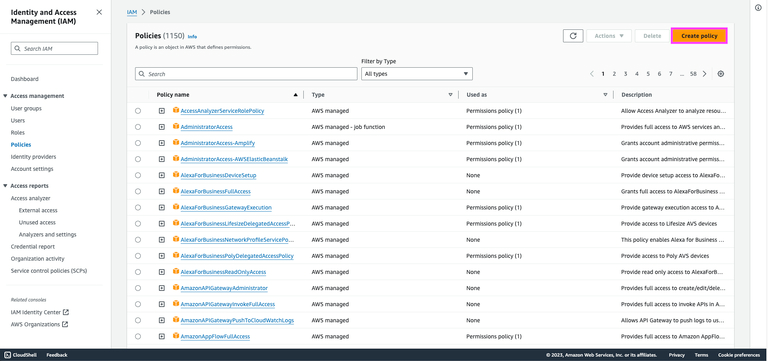
-
Add the JSON from the Bedrock Integration form to your policy:
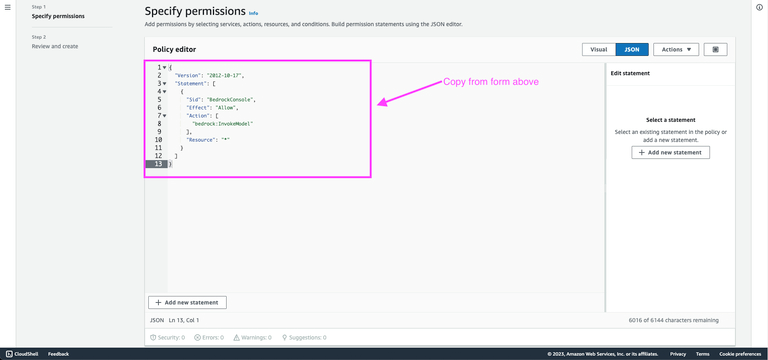
-
Create a role with the Permissions policy you just created:
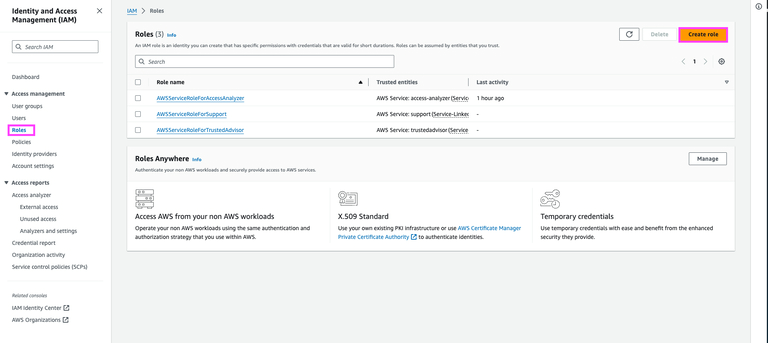
-
Choose AWS account as the trusted entity type. If you set an external ID be sure to copy it and add it to the Bedrock integrations settings in Arize AX.
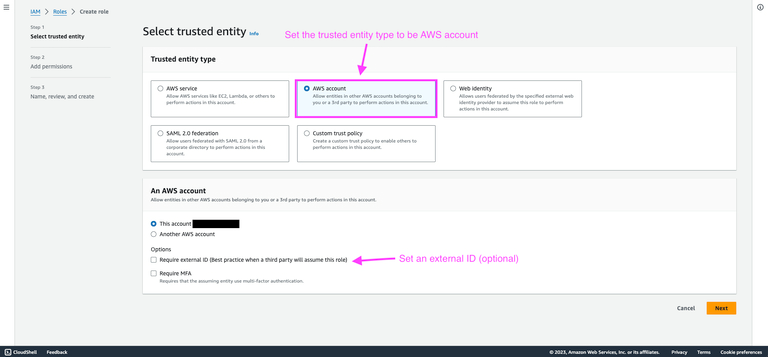
-
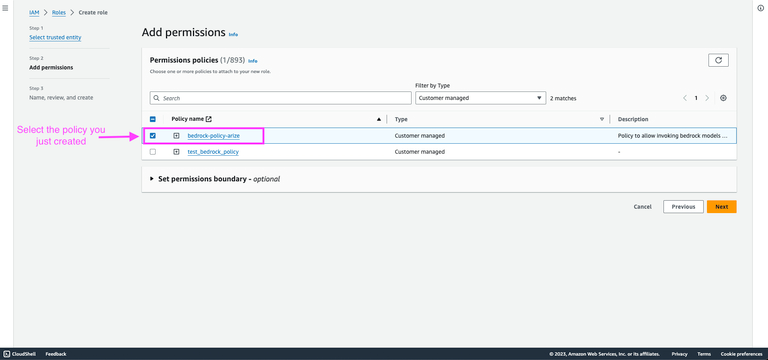
Add the permissions policy you created above:
-
Create your role then go in to edit the trusted entities JSON:
-
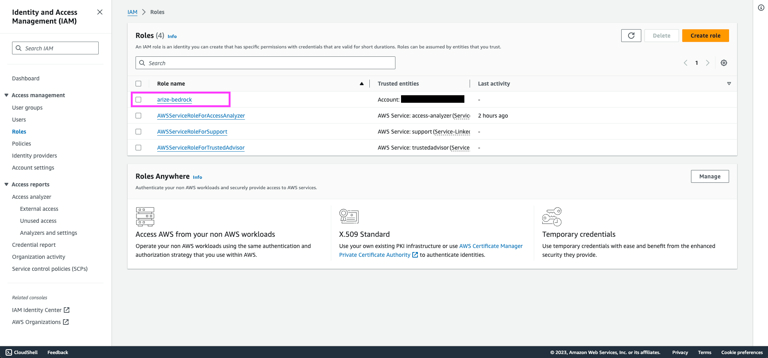
Navigate to the trust relationships tab for your new role. From there, copy the new role’s ARN and add it to the Bedrock integration settings in Arize AX:

-
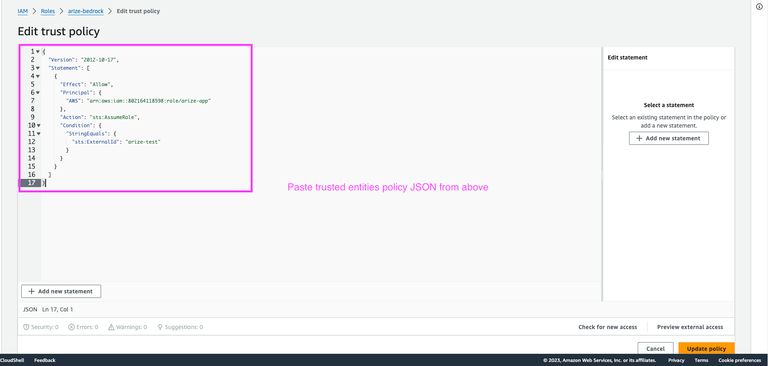
Copy the trusted entities policy from the Bedrock integration settings in Arize AX:

-
Paste the trusted entities policy into the JSON editor:
AWS Region
Set the appropriate AWS region in the prompt playground. This is stored locally in the browser after being set.Advanced Settings

The Advanced Settings configuration pane
- Supports Function Calling - Turn this on to allow the integration to use function calling features. This is on by default.
- Authorized Orgs - Configure which organizations have access to this integration.
- Authorized Spaces - Configure which spaces have access to this integration.